


网络请求
可以凭借客户端的ip地址来精准识别设备,或者客户端永远从域名找到服务端,服务端提供接口,其中代表了某些参数,比如https://aaa.bbb.com/a.php?dz=beijing&time=today,对于如下的服务器。GET请求(这tm和postman差不多了,GET啊POST啊
服务端(储存了大量的数据)a.Php(提供天气)b.Php(提供图片)/tmp/c.Php(提供新闻)
using System.Collections;
using System.Collections.Generic;
using UnityEngine;
using UnityEngine.Networking;

public class RequestTest : MonoBehaviour
{
    void Start()
    {
        StartCoroutine(request());
    }

    IEnumerator request()
    {
        // 创建一个请求
        var request = UnityWebRequest.Get("https://www.baidu.com/s?wd=%E6%96%B0%E9%97%BB&pn=20");
        // 发起请求
        yield return request.SendWebRequest();
        // 代码执行到这里就证明请求结束,拿到响应的内容了
        if (request.result == UnityWebRequest.Result.Success)
        {
            // 获取响应内容
            string str = request.downloadHandler.text;
            Debug.Log(str);
        }
    }
}- 类定义:
RequestTest继承自MonoBehaviour,这意味着它可以附加到Unity场景中的游戏对象上。
- Start方法:
- 在游戏开始时调用,启动一个协程
request()。
- 在游戏开始时调用,启动一个协程
- request协程:
- 使用
IEnumerator返回类型,表示这是一个协程。 - 创建一个
UnityWebRequest对象,使用Get方法向指定的URL发送HTTP GET请求。URL是百度的搜索页面,搜索关键词是“新闻”,每页显示20条结果。 - 使用
yield return等待请求完成。 - 检查请求结果是否成功。
- 如果成功,获取响应内容并将其存储在字符串
str中。 - 使用
Debug.Log输出响应内容到Unity控制台。
- 使用
JSON Object
数据交换是JSON(或者xml不常用 ,实际上你在前端学习时应该了解了
打开www.bejson.com/jsonviewernew/ 将json字符串输入,
{"name":"木剑","attack":10},数组[{"name":"木剑","attack":10},{"name":"铁剑","attack":15}]推荐使用第三方的包,叫做 "JSON Object "
using System.Collections;
using System.Collections.Generic;
using UnityEngine;

public class JsonTest : MonoBehaviour
{
    /*
    木剑,10,100
    铁剑,15,200
    */

    void Start()
    {
        // 基础数据: 键值对 "name":"木剑" "attack":10
        // 两种结构: 字典/对象 {"name":"木剑","attack":10}, 数组[{"name":"木剑","attack":10},{"name":"铁剑","attack":15}]
        // 最终希望的json字符串是:{"items":[{"name":"木剑","attack":10},{"name":"铁剑","attack":15}]}
        // 通过JSONObject第三方工具来创建Json
        string json = getJson();
        Debug.Log(json);
        jsonParse(json);
    }

    // 通过JSONObject第三方工具来创建Json {"items":[{"name":"木剑","attack":10},{"name":"铁剑","attack":15}]}
    string getJson()
    {
        // 最外层是个对象 {}
        JSONObject root = JSONObject.emptyObject;
        // 创建数组结构 []
        JSONObject items = JSONObject.emptyArray;
        // 赋值 {"items":[]}
        root["items"] = items;
        // 创建木剑
        JSONObject item1 = JSONObject.emptyObject;
        item1["name"] = JSONObject.CreateStringObject("木剑");
        item1["attack"] = JSONObject.Create(10);
        // 创建铁剑
        JSONObject item2 = JSONObject.emptyObject;
        item2["name"] = JSONObject.CreateStringObject("铁剑");
        item2["attack"] = JSONObject.Create(15);
        // 放到数组中
        items.Add(item1);
        items.Add(item2);
        // 返回最外层节点转成的JSON字符串
        return root.ToString();
    }

    void jsonParse(string json)
    {
        // 把json字符串转成json对象
        JSONObject root = JSONObject.Create(json);
        // 拿到items
        JSONObject items = root["items"];
        // 遍历两个物品对象
        foreach (JSONObject item in items)
        {
        // 拿到物品名称
        string name = item["name"].stringValue;
        // 拿到物品攻击力
        int attack = item["attack"].intValue;
        // 输出结果
        Debug.Log(name + ": " + attack);
        }
    }
}
实战:天气预报
- request协程:
- 定义了一个名为
request的协程方法。 - 使用
UnityWebRequest.Get方法发送一个GET请求到指定的URL,获取天气数据。 - 使用
yield return request.SendWebRequest()等待请求完成。 - 判断请求结果是否成功,如果成功,则调用
jsonParse方法解析返回的JSON数据。
- 定义了一个名为
- jsonParse方法:
- 定义了一个名为
jsonParse的方法,接受一个字符串参数json。 - 使用
JSONObject.Create(json)将JSON字符串转换为JSON对象。 - 从根JSON对象中获取名为
"data"的JSON对象。 - 从
data对象中获取名为"forecast"的JSON对象。 - 从
forecast数组中获取第一个元素,并解析其"ymd"、"high"、"low"和"notice"字段的值。 - 将解析后的数据格式化为字符串,并赋值给
text.text,显示在UI的Text组件上。
- 定义了一个名为
using System.Collections;
using System.Collections.Generic;
using UnityEngine;
using UnityEngine.UI;

public class RequestJson : MonoBehaviour
{
    private Text text;

    void Start()
    {
        text = GetComponent<Text>();
        // 开始请求
        StartCoroutine(request());
    }

    IEnumerator request()
    {
        // 开始请求
        var request = UnityWebRequest.Get("https://t.weather.sojson.com/api/weather/city/101010100");
        yield return request.SendWebRequest();
        // 判断响应结果
        if (request.result == UnityWebRequest.Result.Success)
        {
            jsonParse(request.downloadHandler.text);
        }
    }

    void jsonParse(string json)
    {
        // 开始解析天气的json
        // 拿到最外层
        JSONObject root = JSONObject.Create(json);
        // 拿到data
        JSONObject data = root["data"];
        // 拿到forecast
        JSONObject forecast = data["forecast"];
        // 解析日期
        string ymd = forecast[0]["ymd"].stringValue;
        string high = forecast[0]["high"].stringValue;
        string low = forecast[0]["low"].stringValue;
        string notice = forecast[0]["notice"].stringValue;

        string str = "日期:" + ymd + "\n" + high + " " + low + "\n小贴士:" + notice;
        text.text = str;
    }
}
api请求在unnity中必须要求带有https,不能说http,如果要忽略这个请求,在unity的project setting中选择"玩家",下拉找到 "允许通过http下载",选择始终允许,即可.
两种对象池的实现
创建和销毁是模型里消耗性能的2个步骤,因此从集合内抽取
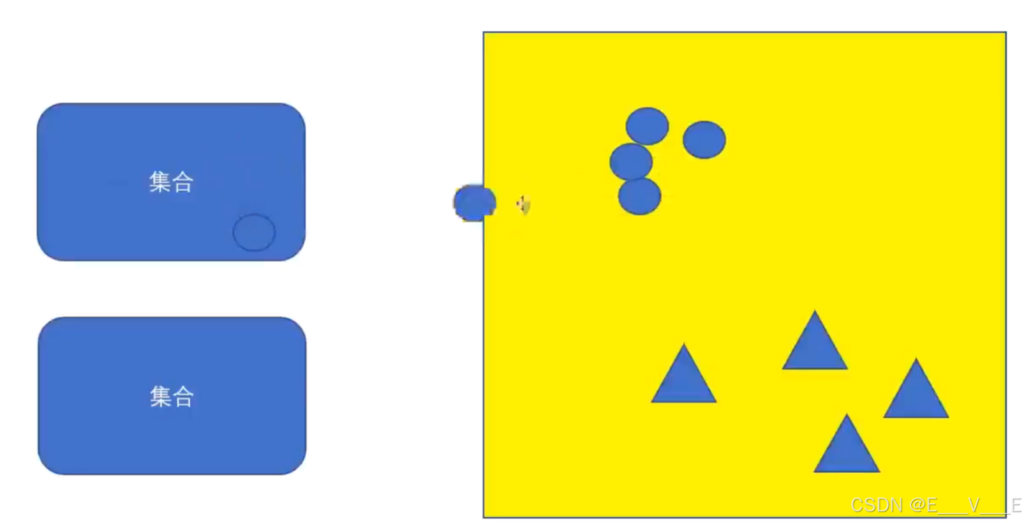
对象池管理器
using System.Collections;
using System.Collections.Generic;
using UnityEngine;

// 对象池
public class PoolStack
{
    // 集合
    public Stack<UnityEngine.Object> stack = new Stack<Object>();

    // 个数
    public int MaxCount = 100;

    // 把游戏物体放入对象池
    public void Push(UnityEngine.Object go)
    {
        if (stack.Count < MaxCount)
        {
            stack.Push(go);
        }
        else
        {
            GameObject.Destroy(go);
        }
    }

    //把游戏物体放入对象池
    public UnityEngine.Object Pop()
    {
        if (stack.Count > 0)
        {
            return stack.Pop();
        }

        return null;
    }

    //清空池子
    public void Clear()
    {
        foreach (UnityEngine.Object go in stack)
        {
            GameObject.Destroy(go);
        }

        stack.Clear();
    }
}

public class PoolManager
{
    // 用于管理多个PoolStack实例或其他对象池相关的功能
    private static PoolManager instance;

    public static PoolManager Instance
    {
        get
        {
            if (instance == null)
            {
                instance = new PoolManager();
            }

            return instance;
        }
    }

    // 管理多个池子
    private Dictionary<string, PoolStack> poolDic = new Dictionary<string, PoolStack>();

    // 从对象池取出对象,没有则创建一个
    public UnityEngine.Object Spawn(string poolName, UnityEngine.Object prefab)
    {
        // 如果没有对应的池子,创建池子
        if (!poolDic.ContainsKey(poolName))
        {
            poolDic.Add(poolName, new PoolStack());
        }

        // 从池子中拿出一个
        UnityEngine.Object go = poolDic[poolName].Pop();
        if (go == null)
        {
            go = GameObject.Instantiate(prefab);
        }

        return go;
    }
    // 清空对象池
    public void UnSpawn(string poolName)
    {
        // 清空所有池子中的资源
        foreach (var pool in poolDic.Values)
        {
            if (poolDic.ContainsKey(poolName))
            {
                poolDic[poolName].Clear();
                poolDic.Remove(poolName);
            }
        }
    }
}
我们接着看一下unity的提供的对象池
成员变量:定义了一个私有的ObjectPool<GameObject>类型的变量testPool,用于存储对象池。
在Unity的生命周期中,Start方法会在脚本第一次运行时被调用。创建一个对象池testPool,并传入四个委托:第一个委托是一个工厂方法,用于创建新的GameObject。第二个委托是在从对象池中获取对象时调用的方法,用于激活对象。第三个委托是在将对象返回到对象池时调用的方法,用于禁用对象。第四个委托是在销毁对象时调用的方法,用于销毁对象。
using System.Collections;
using System.Collections.Generic;
using UnityEngine;
using UnityEngine.Pool;
public class PoolTest : MonoBehaviour
{
// 对象池
private ObjectPool<GameObject> testPool;
void Start()
{
// 创建一个对象池
testPool = new ObjectPool<GameObject>(
() => // 创建新对象的委托
{
return new GameObject();
},
obj => // 从对象池中获取物品的操作
{
obj.SetActive(true);
},
obj => // 往对象池中保存物品的操作
{
obj.SetActive(false);
},
obj => // 销毁对象的操作
{
Destroy(obj);
},
true, 100, 1000
);
GameObject go = testPool.Get();//获取一个对象
testPool.Release(go);//回收一个对象
}
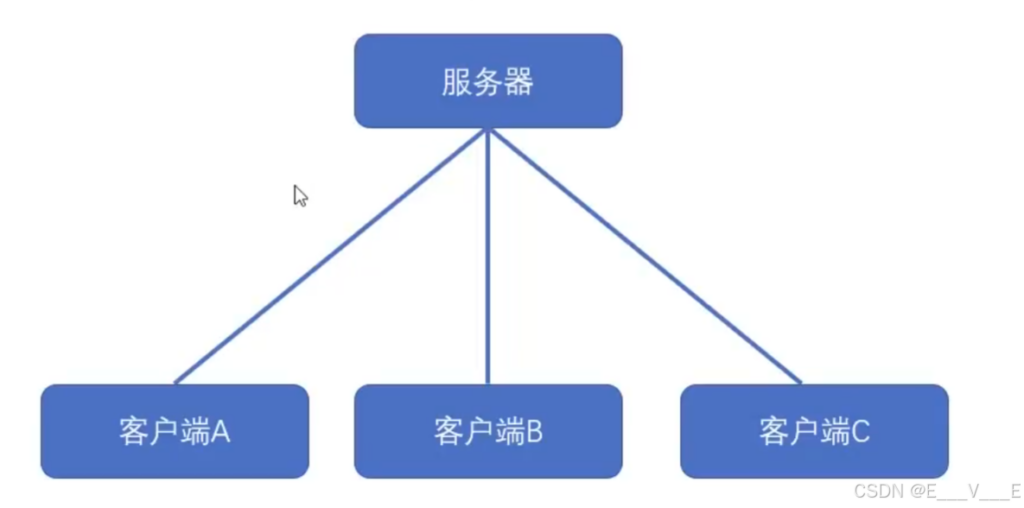
}网游框架理论知识
网游框架:角色、射击、单机、联网、网游,通过Socket和hp-socket来联系
通过学习,我才知道其实玩法,策划等等才是游戏的核心内容,正如2023年诺贝尔奖经济学奖认为政治活动对经济的作用,就好像科技是第一生产力,但是政治可以是第一甚至0.5,技术也就那样了,现在这么卷,既要技术能担起担子,又要软性的如人情等等获得担子的机会
两种传递方式,数据(0000111101011)和字符串(aaaabbbccc).
SocketSocket连接 <----------------------------> HP-SocketIntPtr连接句柄
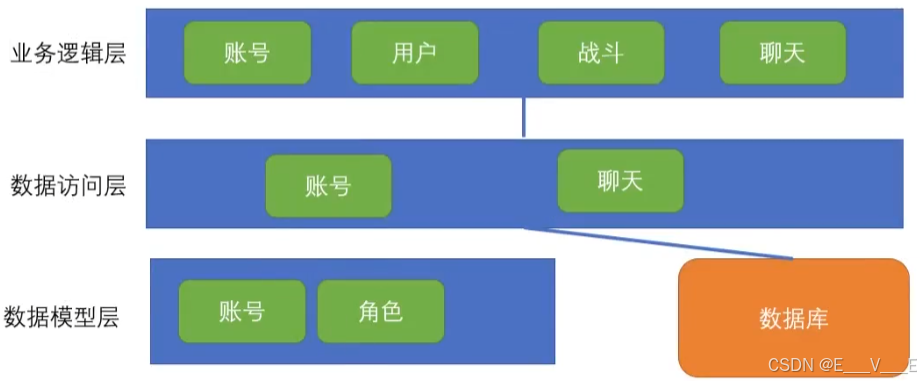
Class Message{
    byte type;      //账号、用户、战斗、聊天
    int command;    //命令1234
    object content; //参数
}
接下来是业务逻辑层 , 分成几大模块, 比如账号,用户,战斗,聊天等等
服务端Socket通信代码
我们创建一个新项目 控制台应用 .NET Framework,用于创建命令行应用程序的项目,不是.net9.0和.net8.0,是full framework
创建一个新的Server类 , 我们选择工具NuGet,选择hpSocket.net,右键选择安装,如图所示: 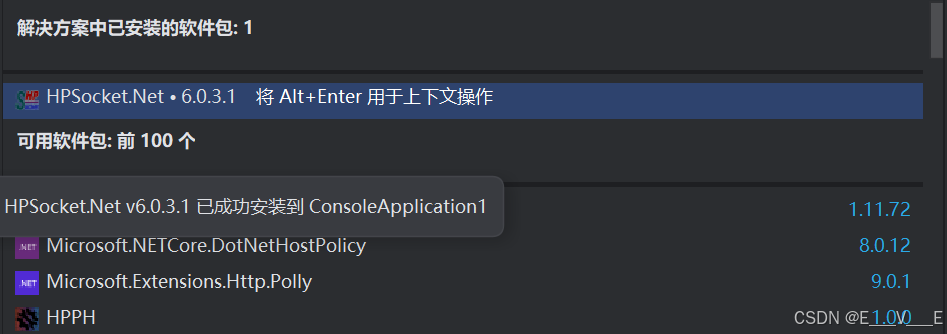
将Program.cs变成
using System;

namespace ConsoleApplication1
{
    internal class Program
    {
        public static void Main(string[] args)
        {
            new Server();
            Console.ReadLine();
        }
    }
}
using System;
using HPSocket;
using HPSocket.Tcp;
namespace ConsoleApplication1
{
public class Server
{
//创建一个接收消息用的socket服务端
public TcpServer server = new TcpServer();
//构造
public Server()
{
//ip地址
server.Address = "127.0.0.1";
//端口
server.Port = Convert.ToUInt16(5566);
//启动
server.Start();
}
}
}点击运行,看到cmd中有一闪一闪的光标,标注着他已经监听这个端口了
这个给了我们三个.....,分别是接收到客户端连接,客户端断开连接,收到客户消息
//接收到客户端连接
server.OnAccept += Server_OnAccept;
//客户端断开连接
server.OnClose += Server_OnClose;
//收到客户端发来的消息
server.OnReceive += Server_OnReceive;
首先我们接受一下客户端的消息,看看是否是我们的数据
//当收到客户端发来的消息会调用
        private HandleResult Server_OnReceive(IServer sender, IntPtr connld, byte[] data)
        {
            //测试接收客户端消息
            string msg = Encoding.UTF8.GetString(data);
            Console.WriteLine(msg);
            //给客户端回复一个消息,我收到了
            byte[] data2 = Encoding.UTF8.GetBytes("服务端收到了");
            //测试给该客户端回消息
            server.Send(connld, data2, data2.Length);
            return HandleResult.Ok;
        }
因此原来是Server.cs是这样的,但是Program不变
using System;
using System.Text;
using HPSocket;
using HPSocket.Sdk;
using HPSocket.Tcp;

namespace ConsoleApplication1
{
    public class Server
    {
        //创建一个接收消息用的socket服务端
        public TcpServer server = new TcpServer();
        //构造

        public Server()
        {
            //ip地址
            server.Address = "127.0.0.1";
            //端口
            server.Port = Convert.ToUInt16(5566);
            //接收到客户端连接
            server.OnAccept += Server_OnAccept;
            //客户端断开连接
            server.OnClose += Server_OnClose;
            //收到客户端发来的消息
            server.OnReceive += Server_OnReceive;
            //启动
            server.Start();
        }

        //当收到客户端发来的消息会调用
        private HandleResult Server_OnReceive(IServer sender, IntPtr connld, byte[] data)
        {
            //测试接收客户端消息
            string msg = Encoding.UTF8.GetString(data);
            Console.WriteLine(msg);
            //给客户端回复一个消息,我收到了
            byte[] data2 = Encoding.UTF8.GetBytes("服务端收到了");
            //测试给该客户端回消息
            server.Send(connld, data2, data2.Length);
            return HandleResult.Ok;
        }

        private HandleResult Server_OnClose(IServer sender, IntPtr connId, SocketOperation socketOperation,
            int errorCode)
        {
            return HandleResult.Ok;
        }

        private HandleResult Server_OnAccept(IServer sender, IntPtr connId, IntPtr client)
        {
            return HandleResult.Ok;
        }
    }
}
在unity中创建一个项目,首先创建一个文件夹,叫做Plugins,打开页顶栏file----build Profiles
选择其中的 player setting
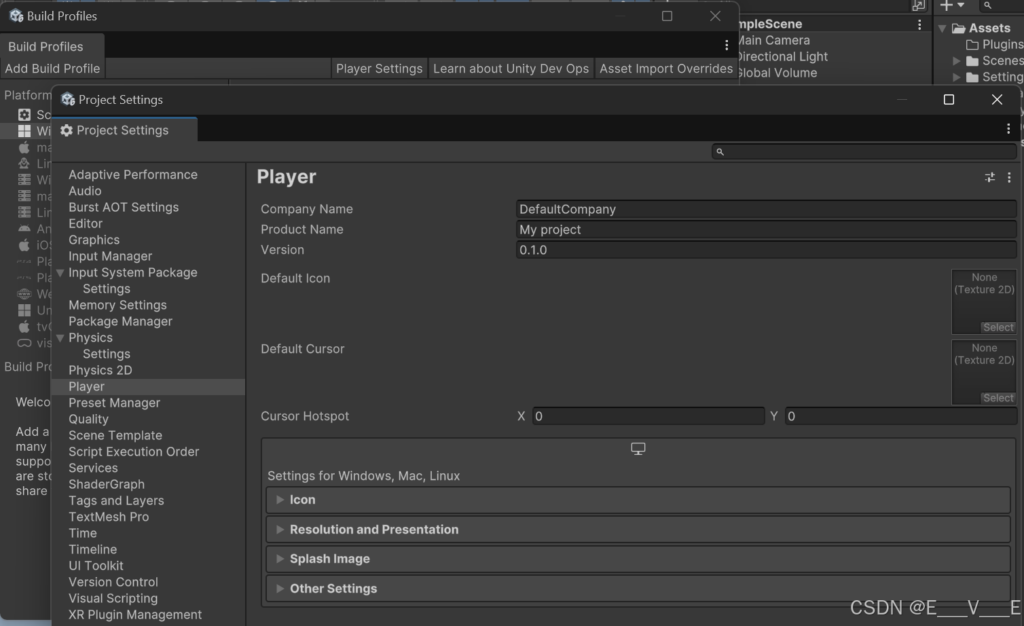
这里有很好多项目选项,我们在other中选择,找到Api CompatibilityLevel,看看是不是*.NET Standard 2.1,换会我们的刚刚的.net framework
往plugins导入 hpsocket.net和hpsocket4c插件,创建一个Client的csharp文件,并且创建一个空物体Client,Client.cs脚本相应的挂上来;
using UnityEngine;
using HPSocket;
using HPSocket.Tcp;
using System;
using System.Text;

public class Client : MonoBehaviour
{
    // 单例
    public static Client Instance;
    // 客户端连接对象
    TcpClient tcpClient = new TcpClient();

    void Awake()
    {
        Instance = this;
        // 让当前游戏物体不被销毁
        DontDestroyOnLoad(gameObject);
        // 设置服务器的ip地址和端口
        tcpClient.Address = "127.0.0.1";
        tcpClient.Port = Convert.ToUInt16(5566);
        // 接收服务端发来的消息
        tcpClient.OnReceive += TcpClient_OnReceive;
        // 连接客户端
        tcpClient.Connect();
    }

    private HandleResult TcpClient_OnReceive(IClient sender, byte[] data)
    {
        // 测试接收到服务端消息,打印出来
        string msg = Encoding.UTF8.GetString(data);
        Debug.Log(msg);
        return HandleResult.Ok;
    }

    void Update()
    {
        // 测试客户端发送消息
        if (Input.GetMouseButtonDown(0))
        {
            byte[] data = Encoding.UTF8.GetBytes("你好,我是客户端");
            tcpClient.Send(data, data.Length);
        }
    }
}
那么我们server基于脚本的,他是服务消息,发送接收消息的。那么对于我们的客户端,他也要接受消息的,这是客户端的代码Server.cs
        private HandleResult Server_OnAccept(IServer sender, IntPtr connId, IntPtr client)
        {
            Console.WriteLine("有客户端成功链接");
            return HandleResult.Ok;
        }
回到服务端运行Server.cs相关代码,再进入unity中运行(这里我运行了两回)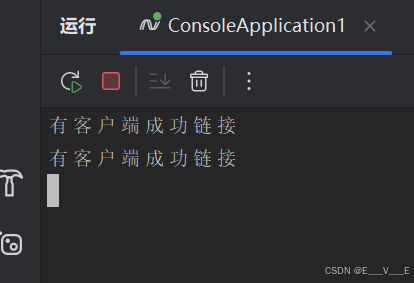
创建传输模型与工具
server.cs删除OnReceive里面的所有东西,客户端client,也把测试update删掉,
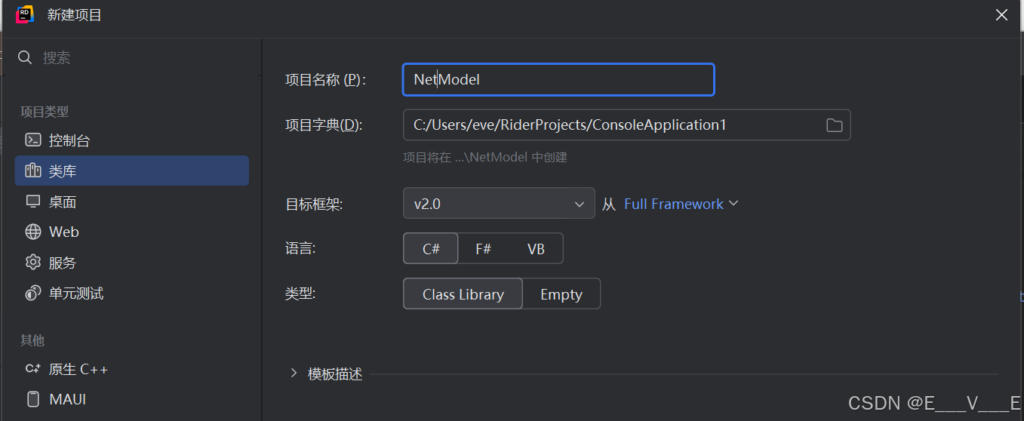
服务器和客户端发表的不是字符串,而是Message,因此是共用的代码,那么我们可以把模板变成一个dll文件放到客户端里,这样便于生成文件格式,怎么做?我们在服务端添加一个新的项目,有一个选项叫做“类库” ,(实际上这里在后来由于报错又改版本,警告 MSB3267 表示您的项目中引用了 System.Core 程序集,但当前目标框架(.NET Framework 2.0)不包含 System.Core。System.Core 是从 .NET Framework 3.5 开始引入的。)
删除Class1,在NetModel中新建Message.cs
using System;
using System.Collections.Generic;
using System.Text;

[Serializable]
public class Message
{
    // 类型
    public byte type;
    // 命令
    public int command;
    // 参数
    public object content;

    // 构造方法
    public Message(byte type, int command, params object[] contents)
    {
        this.type = type;
        this.command = command;
        this.content = contents;
    }

    // 获取第几个参数
    public T GetContent<T>(int index)
    {
        object[] objs = (object[])content;
        return (T)objs[index];
    }
}

[Serializable]
public class Type
{
    // 类型
    public const byte Type_Account = 1;
    public const byte Type_User = 2;
    public const byte Type_Battle = 3;

    // 命令
    // 注册账号 (1账号 2密码)
    public const int Account_RegistC = 100;
    // (1注册成功 0注册失败)
    public const int Account_RegistS = 101;
    // 登陆账号 (1账号 2密码)
    public const int Account_LoginC = 102;
    // (1登陆成功 0登陆失败)
    public const int Account_LoginS = 103;
}
接着,继续创建一个类,叫做MessageTool.cs
using System;
using System.Collections.Generic;
using System.IO;
using System.Runtime.Serialization.Formatters.Binary;
using System.Text;

public class MessageTool{
//对象转二进制

    public static byte[] ToByte(object obj)
    {
        MemoryStream ms = new MemoryStream();
        new BinaryFormatter().Serialize(ms, obj);
        byte[] data = new byte[ms.Length];
        Buffer.BlockCopy(ms.GetBuffer(),0, data, 0,(int)ms.Length);
        ms.Close();
        return data;
    }

    //二进制转对象
    public static Message ToObj(byte data)
    {
        MemoryStream ms = new MemoryStream(data);
        object obj = new BinaryFormatter().Deserialize(ms);
        ms.Close();
        return obj as Message;
    }
}
打开NetModel的属性
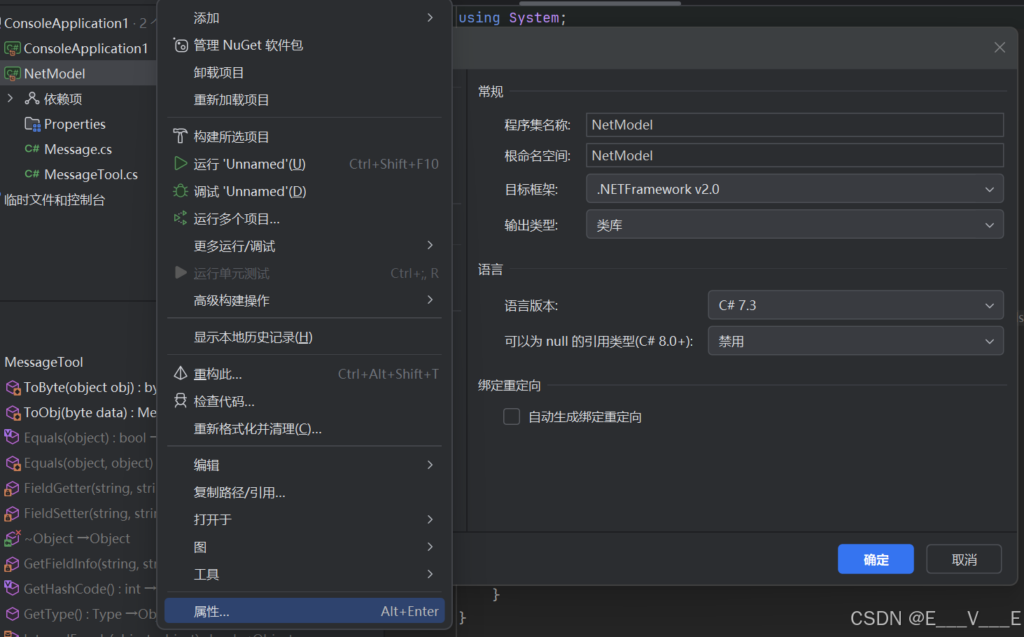
在Debug|AnyCPU中,有一个输出路径,把他导向unity的Plugin文件夹中,我这里则是这样的。
右键NetModel,选择构建 ,unity真的神经,爆牛魔错呢啊啊啊
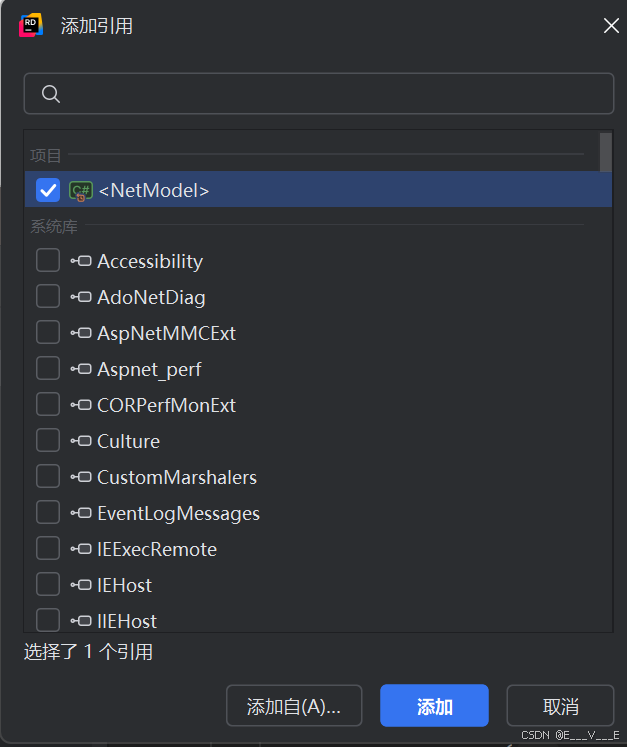
对于服务端的,我们右键添加----引用,勾选上NetModel即可
服务端消息分发
在服务端添加2个新的文件夹BLL和DAL,还有文件夹Model,
BLL下建立一个类IMessageHandler.cs和AccountBLL.cs,还有BLLManager
using System;
using System.Collections.Generic;
using System.Linq;
using System.Text;
using System.Threading;

public interface IMessageHandler
{
    void Server_OnReceive(IntPtr connId, Message message);

    void Server_OnClose(IntPtr connId);
}
using System;
namespace ConsoleApplication1
{
public class AccountBLL : IMessageHandler
{
public void Server_OnClose(IntPtr connld)
{
}
public void Server_OnReceive(IntPtr connld, Message message)
{
}
}
}using System;
using System.Text;
using HPSocket;
using HPSocket.Sdk;
using HPSocket.Tcp;
namespace ConsoleApplication1
{
public class Server
{
//创建一个接收消息用的socket服务端
public TcpServer server = new TcpServer();
//构造
public Server()
{
//ip地址
server.Address = "127.0.0.1";
//端口
server.Port = Convert.ToUInt16(5566);
//接收到客户端连接
server.OnAccept += Server_OnAccept;
//客户端断开连接
server.OnClose += Server_OnClose;
//收到客户端发来的消息
server.OnReceive += Server_OnReceive;
//启动
server.Start();
}
//当收到客户端发来的消息会调用
private HandleResult Server_OnReceive(IServer sender, IntPtr connId, byte[] data)
{
//把二进制转成message
Message message = MessageTool.ToObj(data);
switch (message.type)
{
case Message.Type.Type_Account:
//分发到账号模块
BLLManager.Instance.account.Server_OnReceive(connId, message);
break;
case Message.Type.Type_User:
//分发到用户模块
break;
}
return HandleResult.Ok;
}
//发送消息
public /*static*/ void Send(IntPtr ptr, byte type, int command, params object[] obj)
{
//创建消息
Message msg = new Message(type, command, obj);
//转换为字节数组
byte[] data = MessageTool.ToByte(msg);
//发送
server.Send(ptr, data, data.Length);
}
private HandleResult Server_OnClose(IServer sender, IntPtr connId, SocketOperation socketOperation,
int errorCode)
{
//分发关闭消息
BLLManager.Instance.account.Server_OnClose(connId);
return HandleResult.Ok;
}
private HandleResult Server_OnAccept(IServer sender, IntPtr connId, IntPtr client)
{
Console.WriteLine("有客户端成功链接");
return HandleResult.Ok;
}
}
}
namespace ConsoleApplication1
{
    public class BLLManager
    {
        private static BLLManager instance;

        public static BLLManager Instance
        {
            get
            {
                if (instance == null)
                {
                    instance = new BLLManager();
                }

                return instance;
            }
        }
        public AccountBLL account = new AccountBLL();
    }
}
服务端登陆注册
在model下面新建AccountModel.cs,这个模型是由数据层dal来操作的,
namespace ConsoleApplication1
{
    public class AccountModel
    {
        public int ID;
        public string Account;
        public string Password;
    }
}
因此,我们要在在帐号层新建一个类AccountDAL,
using System;
using System.Collections.Generic;

namespace ConsoleApplication1
{
    public class AccountDAL
    {
        //保存我们的账号
        private List<AccountModel> accountList = new List<AccountModel>();

        //登陆成功的账号IntPtr连接
        private Dictionary<IntPtr, AccountModel> ptrAccountDict = new Dictionary<IntPtr, AccountModel>();

        private int id = 1;

        //添加账号1成功
        public int Add(string account, string password)
        {
            //遍历列表,已存在就返回-1
            foreach (AccountModel model in accountList)
            {
                if (model.Account == account)
                    return -1;
            }

            //创建新的账号
            AccountModel accountModel = new AccountModel();
            accountModel.Account = account;
            accountModel.Password = password;
            accountModel.ID = ++id;
            accountList.Add(accountModel);
            return 1;
        }

        //登陆客户端已经连上了服务器了返回:成功返回用户id,失败-1
        public int Login(IntPtr ptr, string account, string password)
        {
            //是否已经登陆
            foreach (AccountModel model in ptrAccountDict.Values)
                if (model.Account == account)
                {
                    return -1;
                }
            //判断用户名和密码是否正确
            foreach (AccountModel acc in accountList)
            {
                if (acc.Account == account && acc.Password == password)
                {
                    //登陆成功
                    ptrAccountDict.Add(ptr, acc);
                    return acc.ID;
                }
            }
            return -1;
        }
    }
}
我们回到message.cs部分,就是一个服务器的账户密码,返回01判断成功与否,-1登陆失败,那么接下来做一些消息的分发了,
using System;
using System.Collections.Generic;
using System.Linq;
using System.Text;

namespace ConsoleApplication1
{
    public class AccountBLL : IMessageHandler
    {
        public void Server_OnClose(IntPtr connId)
        {
        }

        public void Server_OnReceive(IntPtr connId, Message message)
        {
            //收到账号的所有信息
            switch (message.command)
            {
                case Message.Type.Account_LoginC:
                    Login(connId, message);
                    break;
                case Message.Type.Account_RegistC:
                    Register(connId, message);
                    break;
            }
        }

        void Login(IntPtr connId, Message message)
        {

        }

        void Register(IntPtr connId, Message message)
        {

        }
    }
}
我们其实是在业务逻辑层有一次manager,数据访问层也有一次manager,两次层直接都各有他的manager,那么我们在DAL下加一个类DALManager.cs
namespace ConsoleApplication1
{
    public class DALManager
    {
        private static DALManager instance;
        public static DALManager Instance
        {
            get
            {
                if (instance == null)
                {
                    instance = new DALManager();
                }
                return instance;
            }
        }
        //账号数据
        public AccountDAL account = new AccountDAL();
    }
}
客户端消息监听
我们现在客户端是只能接受到消息,我们打开unity下的Client.cs,可以使用消息框架去做,好处是层次分明,做的也快,现在还有一种方式是消息监听,好处是对于此消息分发框架模式更为简单,但是缺点是在大型工程中会很乱,很多不必要的脚本都监听了。我们选择消息监听
public interface IMessage
{
    void Receive(Message msg);
}
......
/// 保存所有监听消息的对象
public List<IMessage> messageListener = new List<IMessage>();
//消息队列
Queue<Message> messageQueue = new Queue<Message>();
会有问题啊,我们做一个很简单的事情,把消息全部放到队列里,我们在update每一帧拿出一个消息,对其进行一个消息的处理。
那么接下来怎样做一个监听呢?如果外界有一个类啊,将类加到message的消息队列里
为了方便写一个方法添加监听和取消监听
using UnityEngine;
using HPSocket;
using HPSocket.Tcp;
using System;
using System.Collections.Generic;
using System.Text;

public interface IMessage
{
    void Receive(Message msg);
}

public class Client : MonoBehaviour
{
    // 单例
    public static Client Instance;

    // 客户端连接对象
    TcpClient tcpClient = new TcpClient();

    /// 保存所有监听消息的对象
    public List<IMessage> messageListener = new List<IMessage>();

    //消息队列
    Queue<Message> messageQueue = new Queue<Message>();

    void Awake()
    {
        Instance = this;
        // 让当前游戏物体不被销毁
        DontDestroyOnLoad(gameObject);
        // 设置服务器的ip地址和端口
        tcpClient.Address = "127.0.0.1";
        tcpClient.Port = Convert.ToUInt16(5566);
        // 接收服务端发来的消息
        tcpClient.OnReceive += TcpClient_OnReceive;
        // 连接客户端
        tcpClient.Connect();
    }

    //添加监听
    public static void AddListener(IMessage messageListener)
    {
        Instance.messageListener.Add(messageListener);
    }

    //移除监听
    public static void RemoveListener(IMessage messageListener)
    {
        Instance.messageListener.Remove(messageListener);
    }

    private HandleResult TcpClient_OnReceive(IClient sender, byte[] data)
    {
        //二进制转成消息
        Message msg = MessageTool.ToObj(data) as Message;
        //把消息放进队列
        messageQueue.Enqueue(msg);
        return HandleResult.Ok;
    }

    void Update()
    {
        //从队列取出一个消息
        if (messageQueue.Count > 0)
        {
            Message msg = messageQueue.Dequeue();
            //消息传递,把消息传递给所有监听者
            foreach (IMessage msgListener in messageListener)
            {
                msgListener.Receive(msg);
            }
        }
    }
}
完成注册功能
我们首先去商店里面找ui,用了一个有点老古 的SIMPLE FANTASY GUI组件
兴建一个canvas,里面新建一个panels,图片Loading_bar拖入到source image中去,将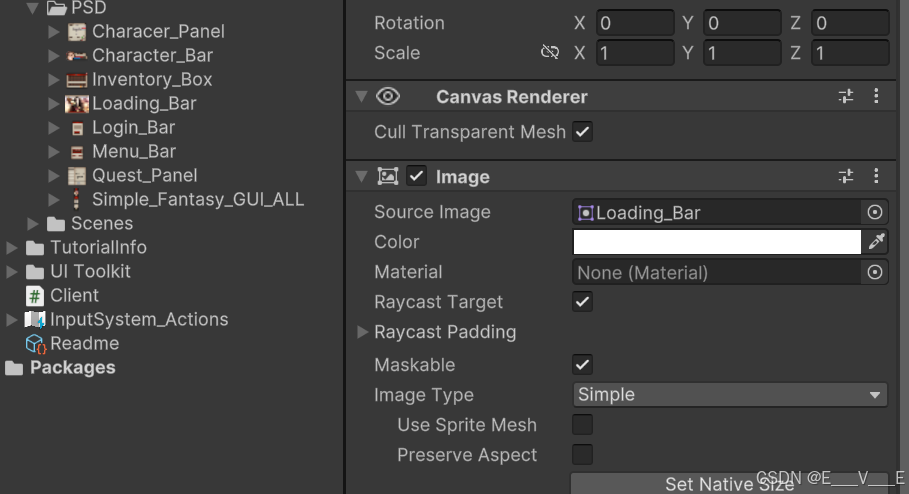
下面再建input field,remane是NameField,下属的placeholder中可以预留字体,调整字号大小.并为namefield其设定背景图片,复制黏贴设立一个密码的输入框,其中type设定为*,这样即可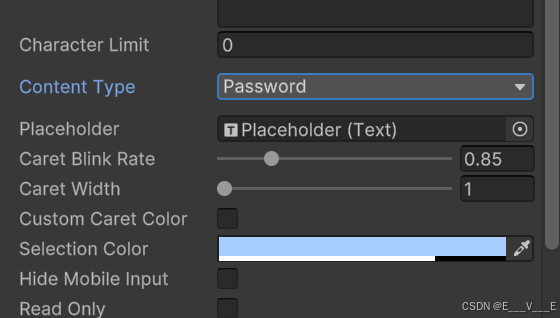
我们新建一下旧版的button,新建一下Reg(注册)和Login(登录) .做成此即可,一种上古网游的感觉
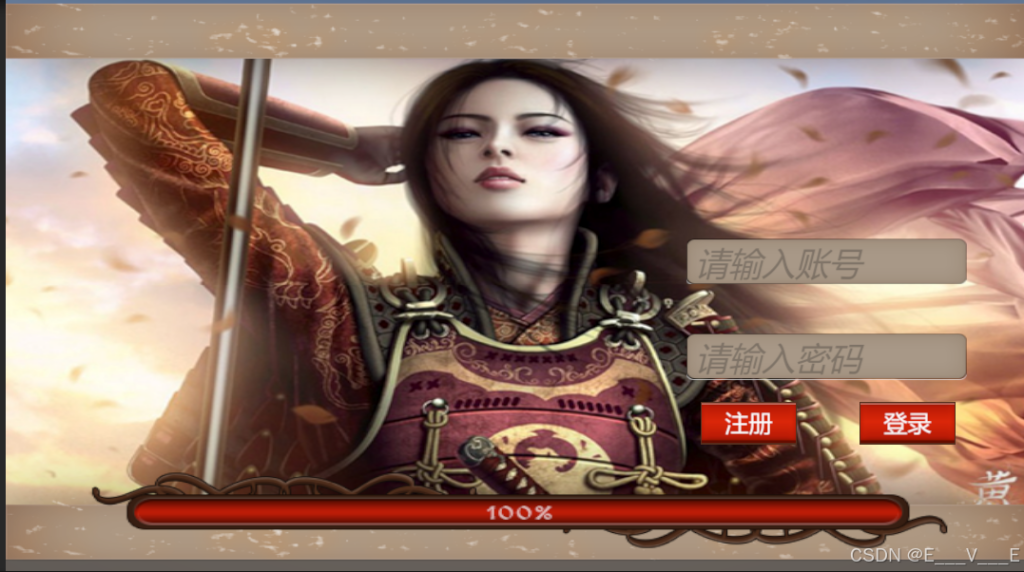
那么开始界面需要对应的脚本,assets下面新建一个文件夹Scripts,里面Login文件夹下LoginControl.cs,把他挂载到Login界面上来 . 那么我们可以用ui框架来做,现在用一个简单的实现网络 .
将Login的页面相绑定,如图所示: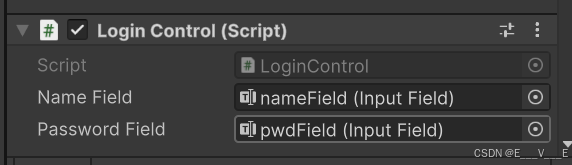
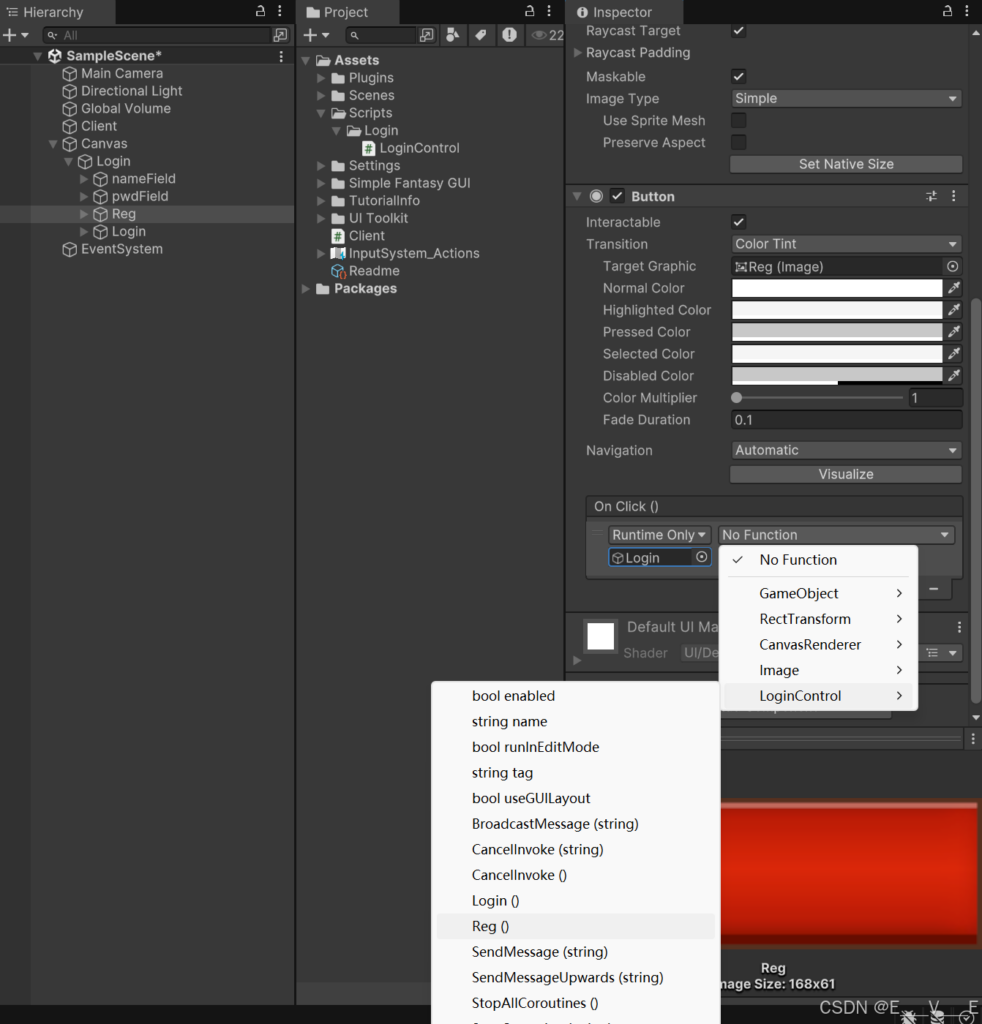
分别设立click事件,如图所示记得拖进去的是整体的Login,根据各自的分别login和reg对应选择
发现Client.cs还没有发送消息的,只有接受消息的,里面新增方法
//发送消息
public static void Send(Message msg)
{
    //消息转数据发送
    byte[] data = MessageTool.ToByte(msg);
    Instance.tcpClient.Send(data, data.Length);
}
那么服务端就会把消息传回到我们的账号 , 即AccountBLL的public void Server_OnReceive(IntPtr connld,Message message)部分
using Unity.VisualScripting;
using UnityEngine;
using UnityEngine.UI;

public class LoginControl: MonoBehaviour,IMessage
{
    public InputField nameField;
    public InputField passwordField;
    void Start()
    {
        //注册消息监听
        Client.AddListener(this);
    }
    //发起登录请求
    public void Login()
    {

    }
    //发起注册请求
    public void Reg()
    {
        if(nameField.text.Length>=3&&passwordField.text.Length>=3)
        {
            Message message = new Message(Message.Type.Type_Account, Message.Type.Account_RegistC, nameField.text,
                passwordField.text);
            //发送消息
            Client.Send(message);
        }
    }
    public void Receive(Message msg)
    {
        //如果消息类型不是账号就不处理
        if (msg.type != Message.Type.Type_Account)
        {
            return;
        }

        //如果接收到服务器发来的注册响应
        if (msg.command == Message.Type.Account_RegistS)
        {
            //收到注册信息
            int res =msg.GetContent<int>(0);
            if (res==1){
                Debug.Log("注册成功");
            }else
            {
                Debug.Log("注册失败");
            }
        }
        //如果接收到服务器发来的登录响应
        if (msg.command == Message.Type.Account_LoginS)
        {

        }
    }
}
完成登陆与提示
接下来做提醒登陆成功的界面,再在canvas下创建一个Panal ,名叫Tip,下面加一个image,接着又是两个text和确认按钮,大概做一些即可.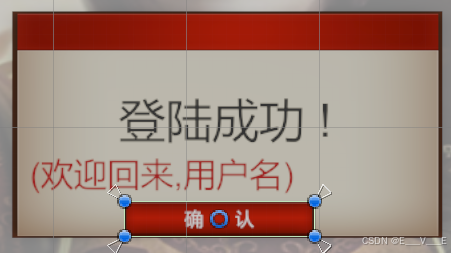
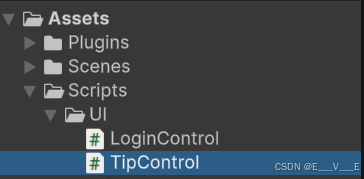
对应的创建脚本,按照图片即可,修改文件夹名字,新建TipControl等等.
using UnityEngine;
using UnityEngine.UI;

public class TipControl : MonoBehaviour
{
    public static TipControl Instance;
    public InputField contentField;
    void Start()
    {
        Instance = this;
    }

    public void ButtonClick()
    {
    }

    void Update()
    {

    }
}
写完后和Tip关联一下, tip中context和context关联一下 . button中关联一下tip,如图所示选择CLick事件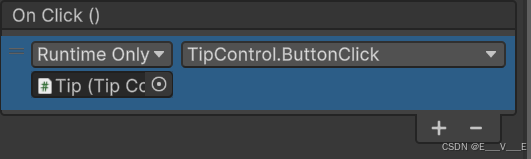
using UnityEngine;
using UnityEngine.UI;

public class TipControl : MonoBehaviour
{
    public static TipControl Instance;
    public Text content;
    void Start()
    {
        Instance = this;
        gameObject.SetActive(false);
    }

    public void ButtonClick()
    {
        gameObject.SetActive(false);
    }

    public void Show(string str)
    {
        content.text = str;
        gameObject.SetActive(true);
    }

    void Update()
    {

    }
}
using Unity.VisualScripting;
using UnityEngine;
using UnityEngine.UI;

public class LoginControl: MonoBehaviour,IMessage
{
    public InputField nameField;
    public InputField passwordField;
    void Start()
    {
        //注册消息监听
        Client.AddListener(this);
    }
    //发起登录请求
    public void Login()
    {

    }
    //发起注册请求
    public void Reg()
    {
        if(nameField.text.Length>=3&&passwordField.text.Length>=3)
        {
            Message message = new Message(Message.Type.Type_Account, Message.Type.Account_RegistC, nameField.text,
                passwordField.text);
            //发送消息
            Client.Send(message);
        }
    }
    public void Receive(Message msg)
    {
        //如果消息类型不是账号就不处理
        if (msg.type != Message.Type.Type_Account)
        {
            return;
        }

        //如果接收到服务器发来的注册响应
        if (msg.command == Message.Type.Account_RegistS)
        {
            //收到注册信息
            int res =msg.GetContent<int>(0);
            if (res==1){
                Debug.Log("注册成功");
                TipControl.Instance.Show("注册成功,请开始你的游戏之旅吧!");
            }else
            {
                Debug.Log("注册失败");
                TipControl.Instance.Show("抱歉,注册失败!请检查你的网络设置等");
            }
        }
        //如果接收到服务器发来的登录响应
        if (msg.command == Message.Type.Account_LoginS)
        {

        }
    }
}
接下来写一下登录这边,
using Unity.VisualScripting;
using UnityEngine;
using UnityEngine.UI;

public class LoginControl: MonoBehaviour,IMessage
{
    public InputField nameField;
    public InputField passwordField;
    void Start()
    {
        //注册消息监听
        Client.AddListener(this);
    }
    //发起登录请求
    public void Login()
    {
        if(nameField.text.Length>=3&&passwordField.text.Length>=3)
        {
            Message message = new Message(Message.Type.Type_Account, Message.Type.Account_LoginC, nameField.text,
                passwordField.text);
            //发送消息
            Client.Send(message);
        }
    }
    //发起注册请求
    public void Reg()
    {
        if(nameField.text.Length>=3&&passwordField.text.Length>=3)
        {
            Message message = new Message(Message.Type.Type_Account, Message.Type.Account_RegistC, nameField.text,
                passwordField.text);
            //发送消息
            Client.Send(message);
        }
    }
    public void Receive(Message msg)
    {
        //如果消息类型不是账号就不处理
        if (msg.type != Message.Type.Type_Account)
        {
            return;
        }

        //如果接收到服务器发来的注册响应
        if (msg.command == Message.Type.Account_RegistS)
        {
            //收到注册信息
            int res =msg.GetContent<int>(0);
            if (res==1){
                Debug.Log("注册成功");
                TipControl.Instance.Show("注册成功,请开始你的游戏之旅吧!");
            }else
            {
                Debug.Log("注册失败");
                TipControl.Instance.Show("抱歉,注册失败!请检查你的网络设置等");
            }
        }
        //如果接收到服务器发来的登录响应
        if (msg.command == Message.Type.Account_LoginS)
        {
            ////收到用户id
            int userlD = msg.GetContent<int>(0);
            if (userlD > 0)
            {
                Debug.Log("登陆成功");
                gameObject.SetActive(false);
            }
            else
            {
                Debug.Log("登陆失败");
                TipControl.Instance.Show("登陆失败");
            }
        }
    }
}
ok了成功实现,这里发现服务端在这里是存储在内存中的 , 暂停服务端时,客户端存储在字典里面的号码没有改变状态, 因此我们要写一个方法在AccountDAL中
using System;
using System.Collections.Generic;
using System.Linq;
using System.Text;

namespace ConsoleApplication1
{
    public class AccountBLL : IMessageHandler
    {
        public void Server_OnClose(IntPtr connId)
        {
            DALManager.Instance.account.Logout(connId);
        }

        public void Server_OnReceive(IntPtr connId, Message message)
        {
            //收到账号的所有信息
            switch (message.command)
            {
                case Message.Type.Account_LoginC:
                    Login(connId, message);
                    break;
                case Message.Type.Account_RegistC:
                    Register(connId, message);
                    break;
            }
        }

        //登录
        void Login(IntPtr connId, Message message)
        {
            int id = DALManager.Instance.account.Login(connId, message.GetContent<string>(0), message.GetContent<string>(1));
            // 给客户端响应
            Server.Send(connId, Message.Type.Type_Account, Message.Type.Account_LoginS, id);
        }
        //注册方法
        void Register(IntPtr connId, Message message)
        {
            int id = DALManager.Instance.account.Add(message.GetContent<string>(0), message.GetContent<string>(1));
            // 给客户端响应 id
            Server.Send(connId, Message.Type.Type_Account, Message.Type.Account_RegistS,id);
        }
    }
}
using System;
using System.Collections.Generic;
namespace ConsoleApplication1
{
public class AccountDAL
{
//保存我们的账号
private List<AccountModel> accountList = new List<AccountModel>();
//登陆成功的账号IntPtr连接
private Dictionary<IntPtr, AccountModel> ptrAccountDict = new Dictionary<IntPtr, AccountModel>();
private int id = 1;
//添加账号1成功
public int Add(string account, string password)
{
//遍历列表,已存在就返回-1
foreach (AccountModel model in accountList)
{
if (model.Account == account)
{
return -1;
}
}
//创建新的账号
AccountModel accountModel = new AccountModel();
accountModel.Account = account;
accountModel.Password = password;
accountModel.ID = ++id;
accountList.Add(accountModel);
return 1;
}
//登陆客户端已经连上了服务器了返回:成功返回用户id,失败-1
public int Login(IntPtr ptr, string account, string password)
{
//是否已经登陆
foreach (AccountModel model in ptrAccountDict.Values)
if (model.Account == account)
{
return -1;
}
//判断用户名和密码是否正确
foreach (AccountModel acc in accountList)
{
if (acc.Account == account && acc.Password == password)
{
//登陆成功
ptrAccountDict.Add(ptr, acc);
return acc.ID;
}
}
return -1;
}
//账号下线
public void Logout(IntPtr ptr)
{
if (ptrAccountDict.ContainsKey(ptr))//原本是ptrAccountDict.Keys.Contains(ptr),是api改了吗?
{
ptrAccountDict.Remove(ptr);
}
}
}
}实际上只有把unity关闭,才会真正打印出有客户端断开连接的log
数据库讲解
数据库管理类
账号连接数据库
客户端选择角色
角色信息模型
完成角色数据类
服务端创建角色逻辑
客户端创建角色
角色创建完成
服务端移动
客户端移动
完成攻击


Comments NOTHING